My Awesome Craft Room Makeover Reveal
Ok…To say I’m excited to show you this craft room makeover reveal is an understatement. This has been a project in the making for quite some time. My sweet husband gets most of the credit as it was his sweat and labor that did the heavy lifting. We did hire out a couple of things, because he either didn’t have the expertise or the time, but believe me, it was well worth it!
I’ll give you a little background before we dive into the before/after pics.
We’ve lived in our lovely home for almost seven years, now. It has a three car garage and one of the garage bays was a workshop for the previous owner, who had already sheetrocked, taped and floated it. When we moved in, I was lucky enough to snag this space and call it my own…my she-cave, craft room, painting studio…or whatever you want to call it.
For almost seven years, this space was functional, but as you’ll be able to see from the pics… pretty?? Well, most definitely NOT!
Here is the BEFORE, facing the garage door. My painting table is on the right and on the left was my sewing/embroidery side. There wasn’t any storage, so I brought in a small utility cabinet. I also stored as much as I could under the tables.
For AC/Heat, I used a portable, dripless unit that we purchase from Lowes. It vented out of the window and did a very good job of cooling and heating. It was just obtrusive.
My Much Awaited Craft Room Makeover Reveal:
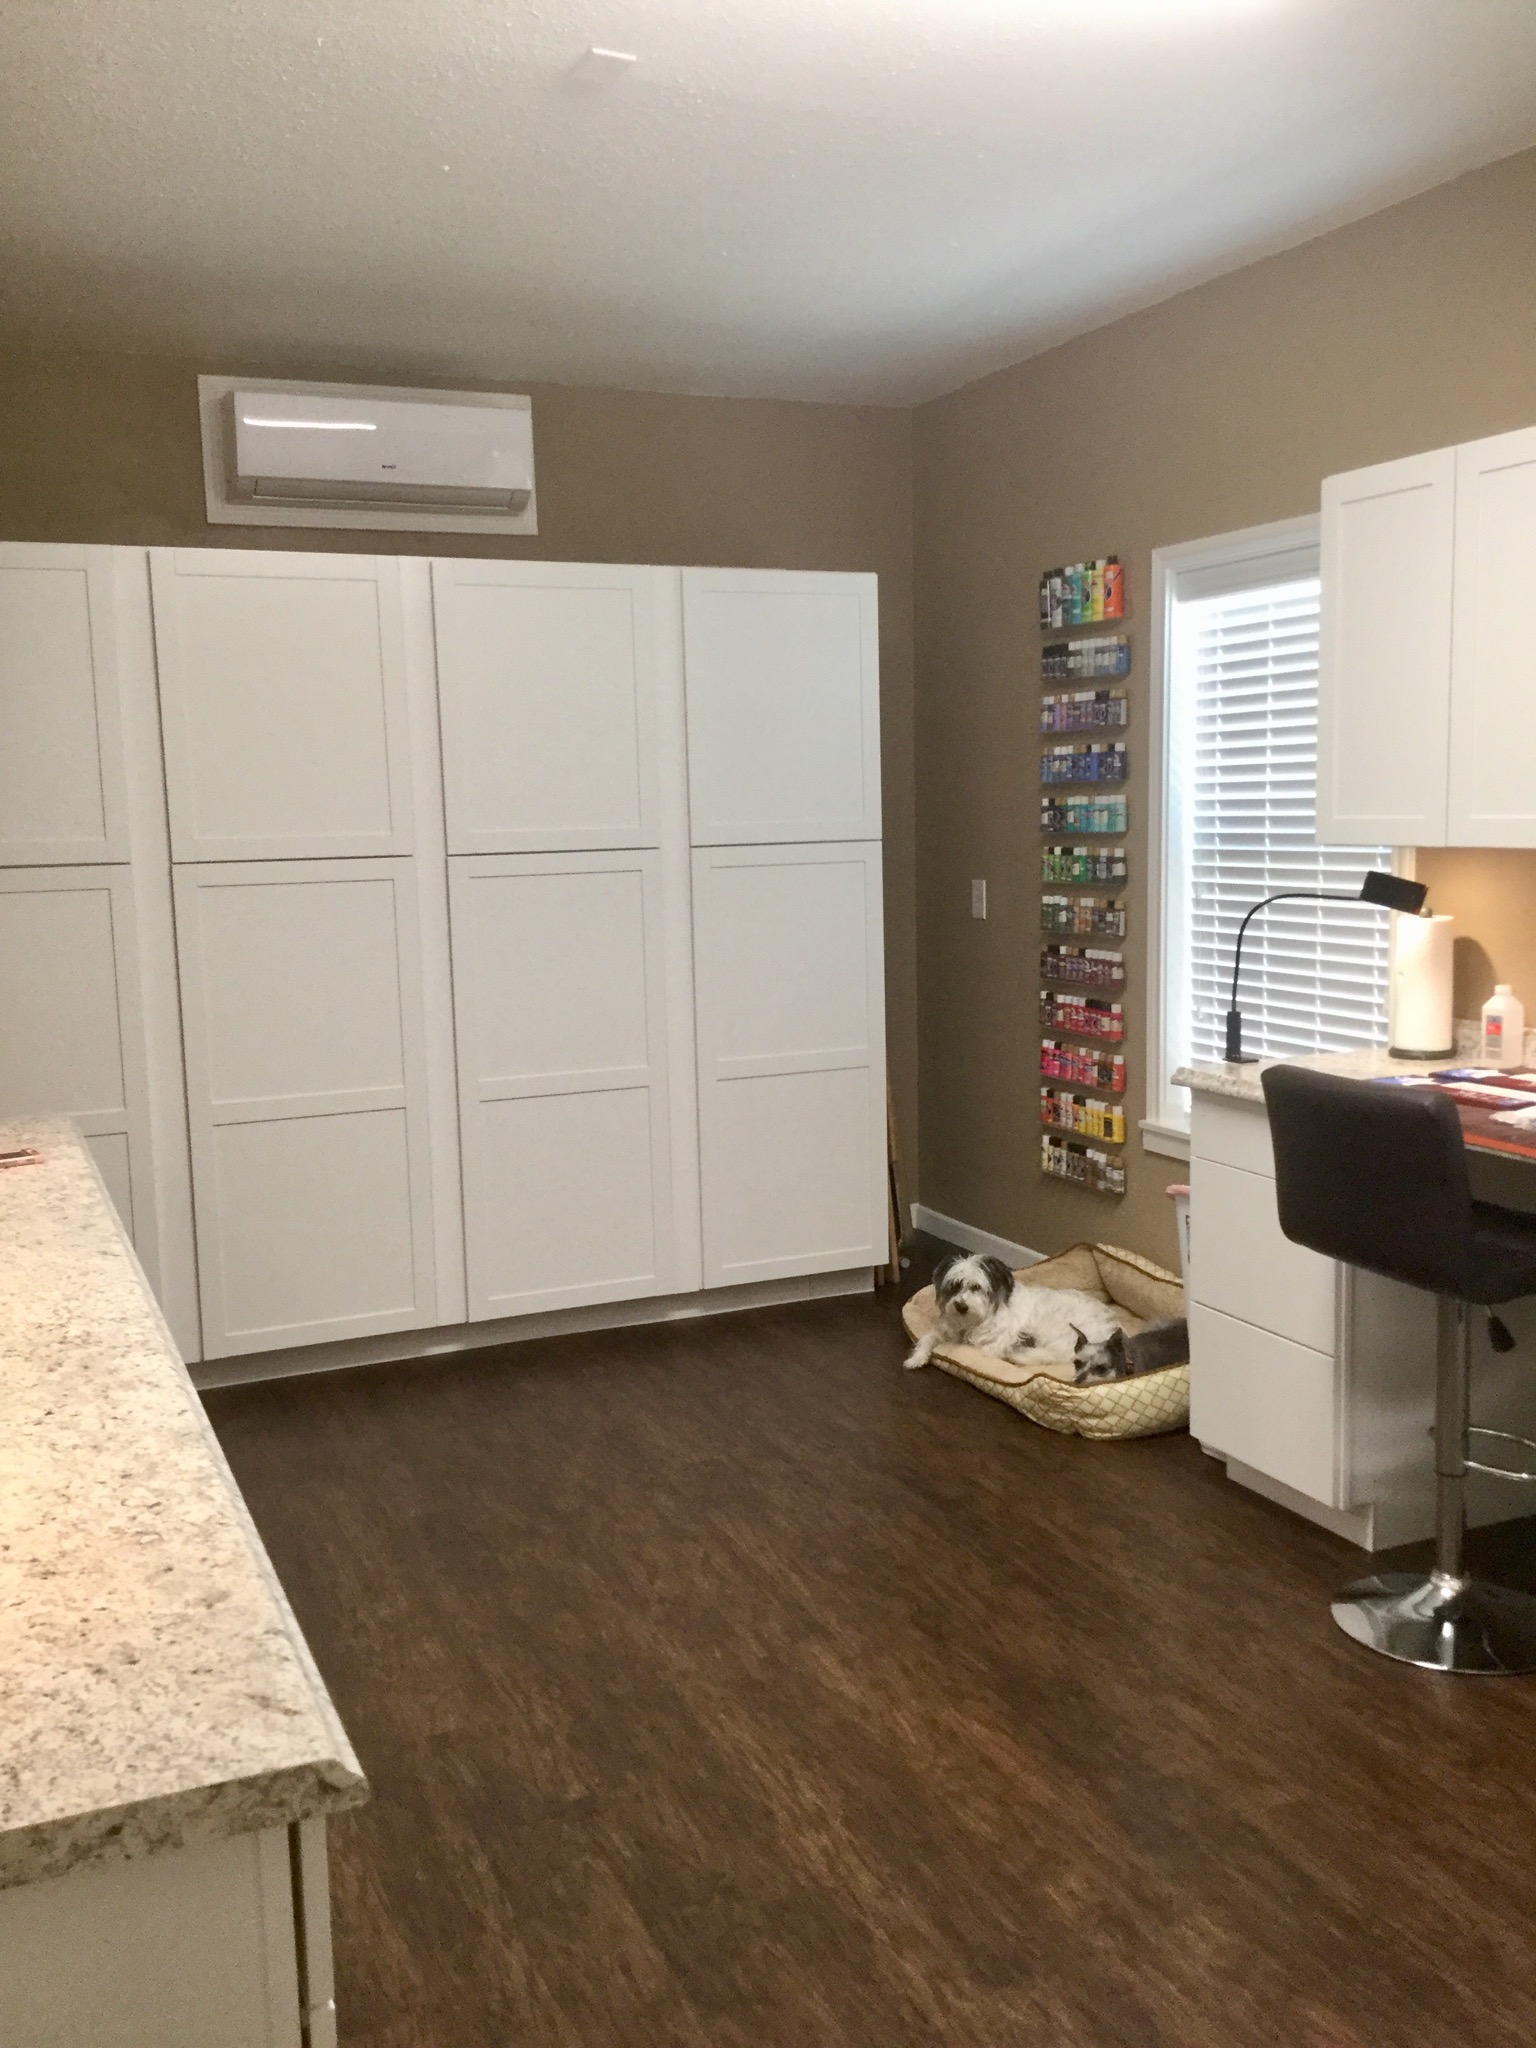
Taaaa Daaaa!!! Here is the AFTER pic! As you can see, there is tons of storage. I kept my “painting station” on the same side, in between the two windows, because I like to be able to look outside and see what’s going on. (My constant companions have a dedicated spot, as well.)
We went ahead and spent the money for a mini split AC/Heat pump (above the storage cabinets.). My husband didn’t like the idea of fixing this space up and still having the portable unit. I have to say, I agreed.
The AC/Heat unit is made by Gree. I had never heard of them, but apparently, they’ve been around for a long time and have a very good reputation. Their reviews were great and for the money, we were very happy. Our neighbor is an AC man and he did the installation for us. When the unit is on, you can barely hear it…which is quite different from the portable unit.
 *This post may contain affiliate links. For more information, see my disclosure page.
Here’s the BEFORE of the sewing/embroidery side. I used two utility tables covered with several yards of bargain bin fabric. Hey…it worked! Besides, it covered the “stuff” underneath.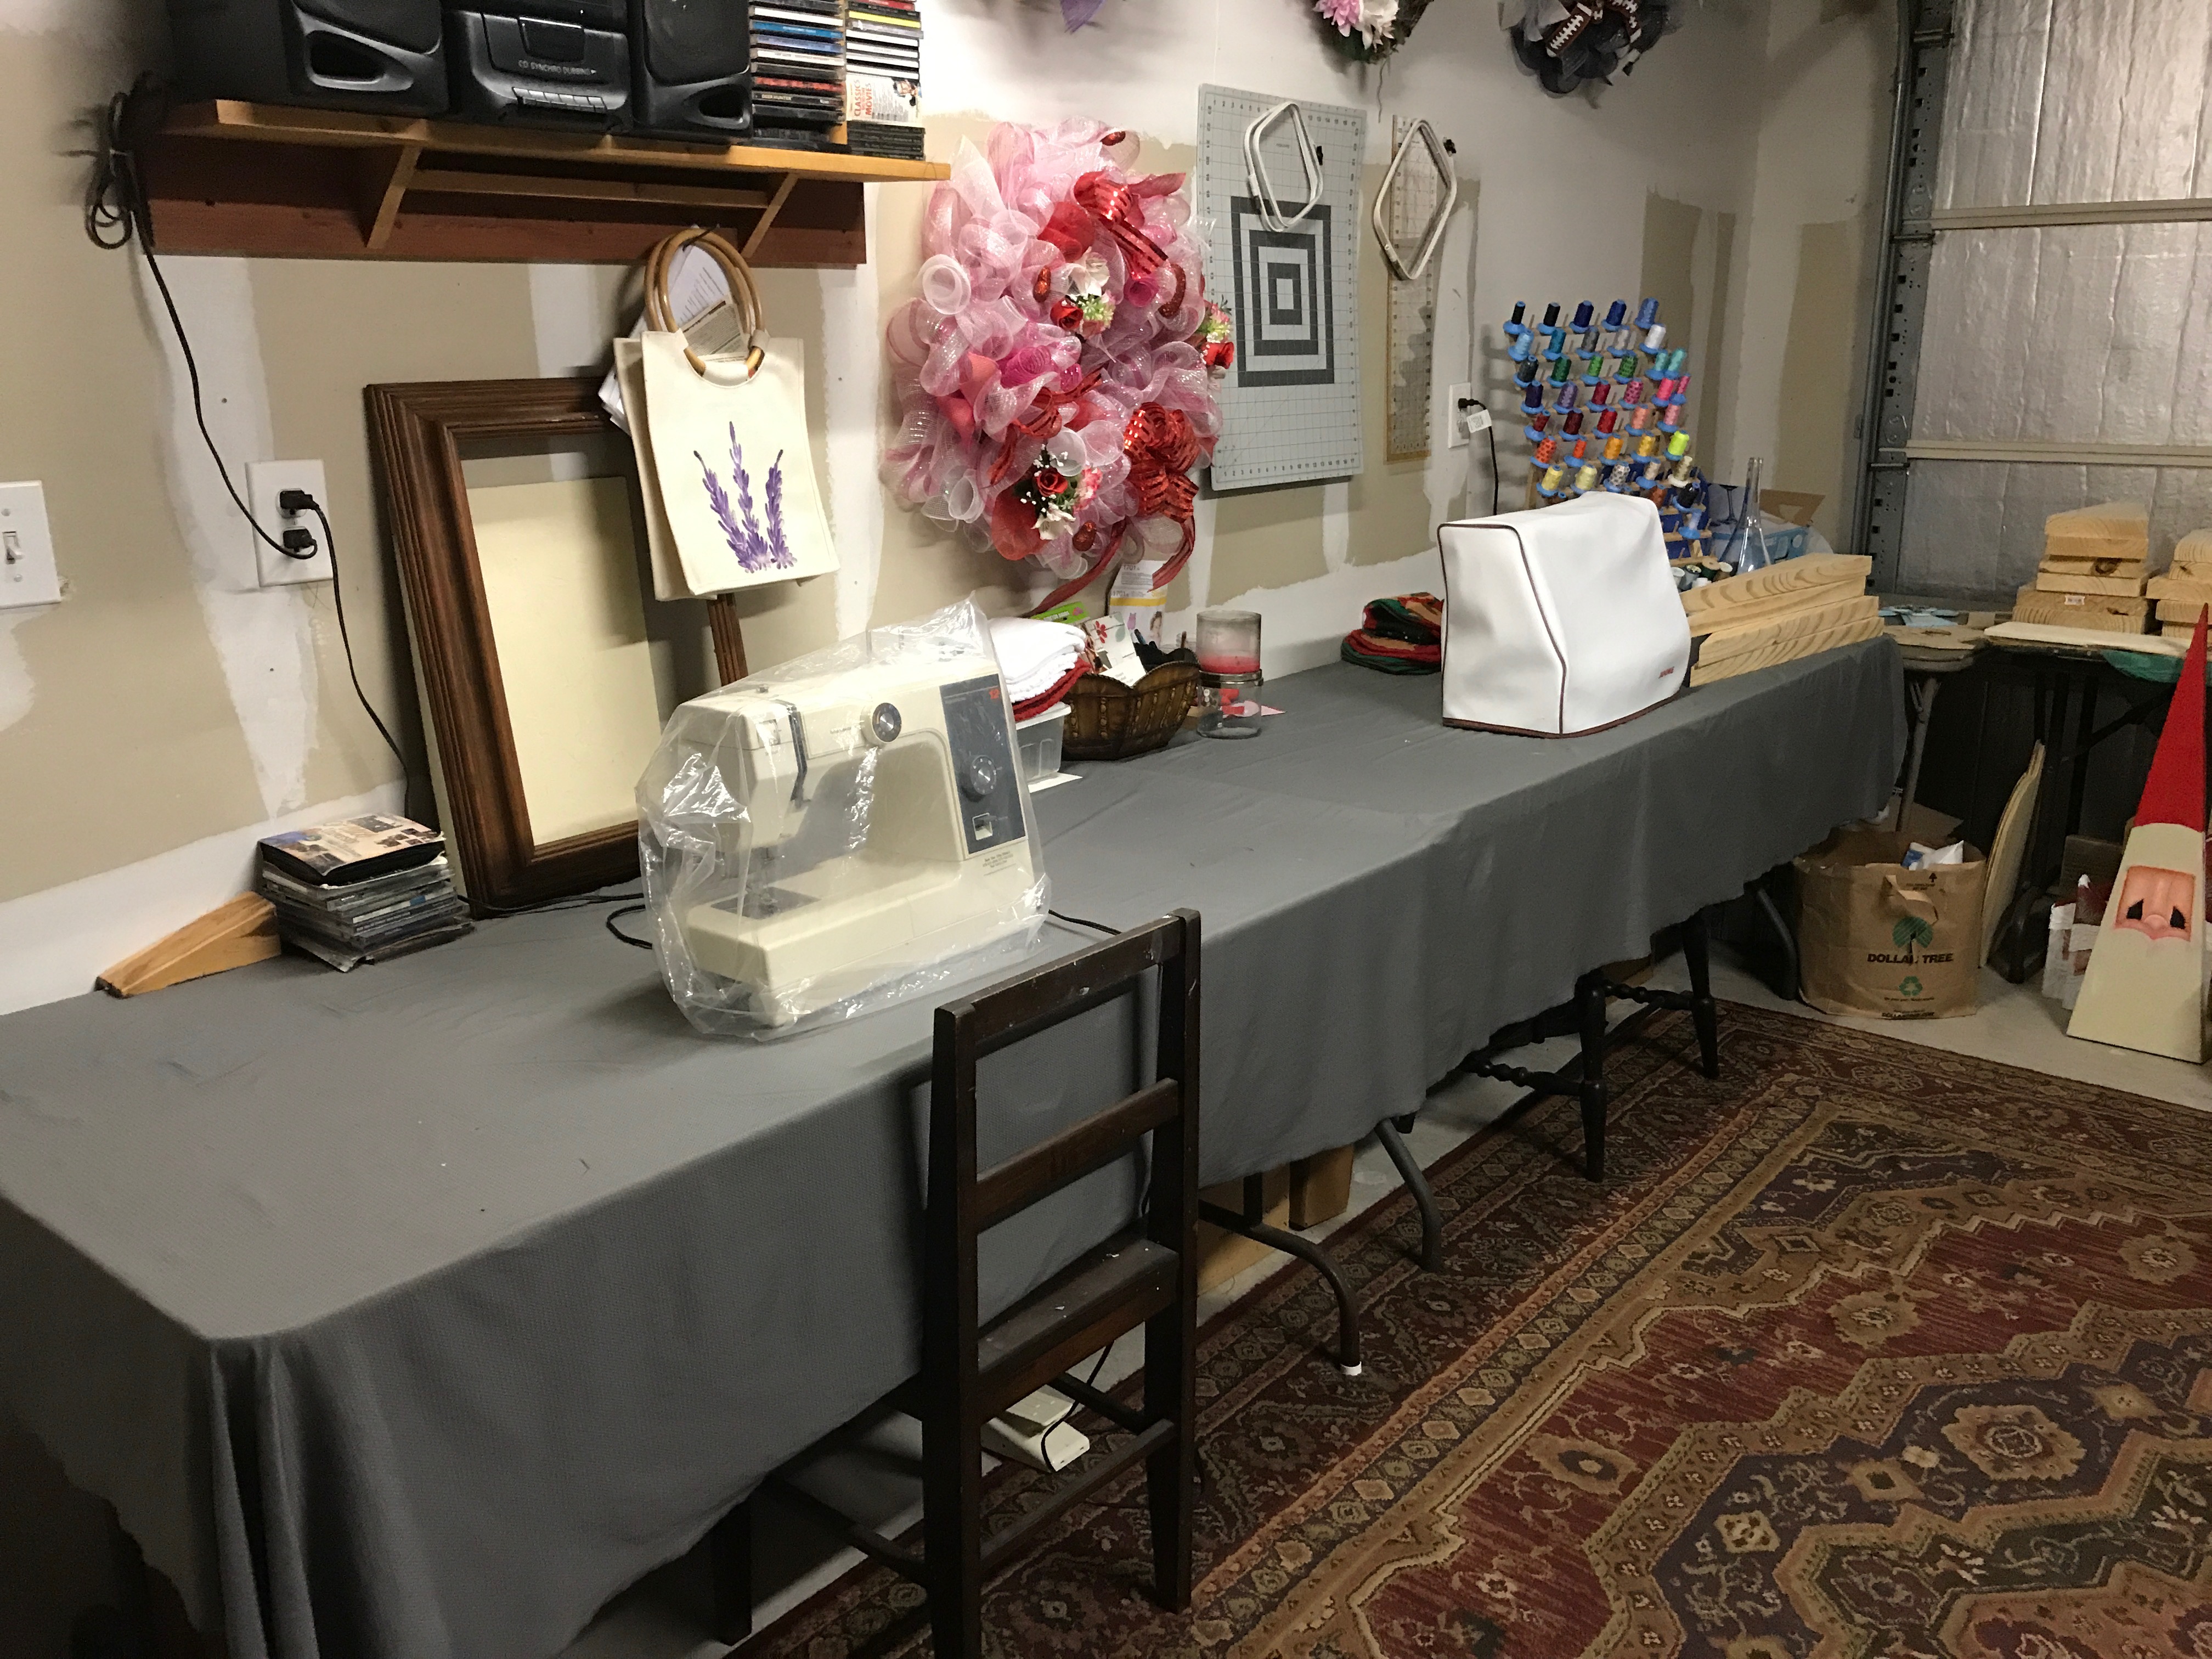 Here’s the beautiful AFTER shot! I have an old Kenmore sewing machine that my husband bought for me in 1988 and It still works great!
My embroidery machine is a Janome 350e. It’s great for monogramming and appliqué, but it’s a single needle machine, so I tell my kids that when I appliqué, it’s a labor of love. I wouldn’t do it for profit. But, nevertheless, I love this machine.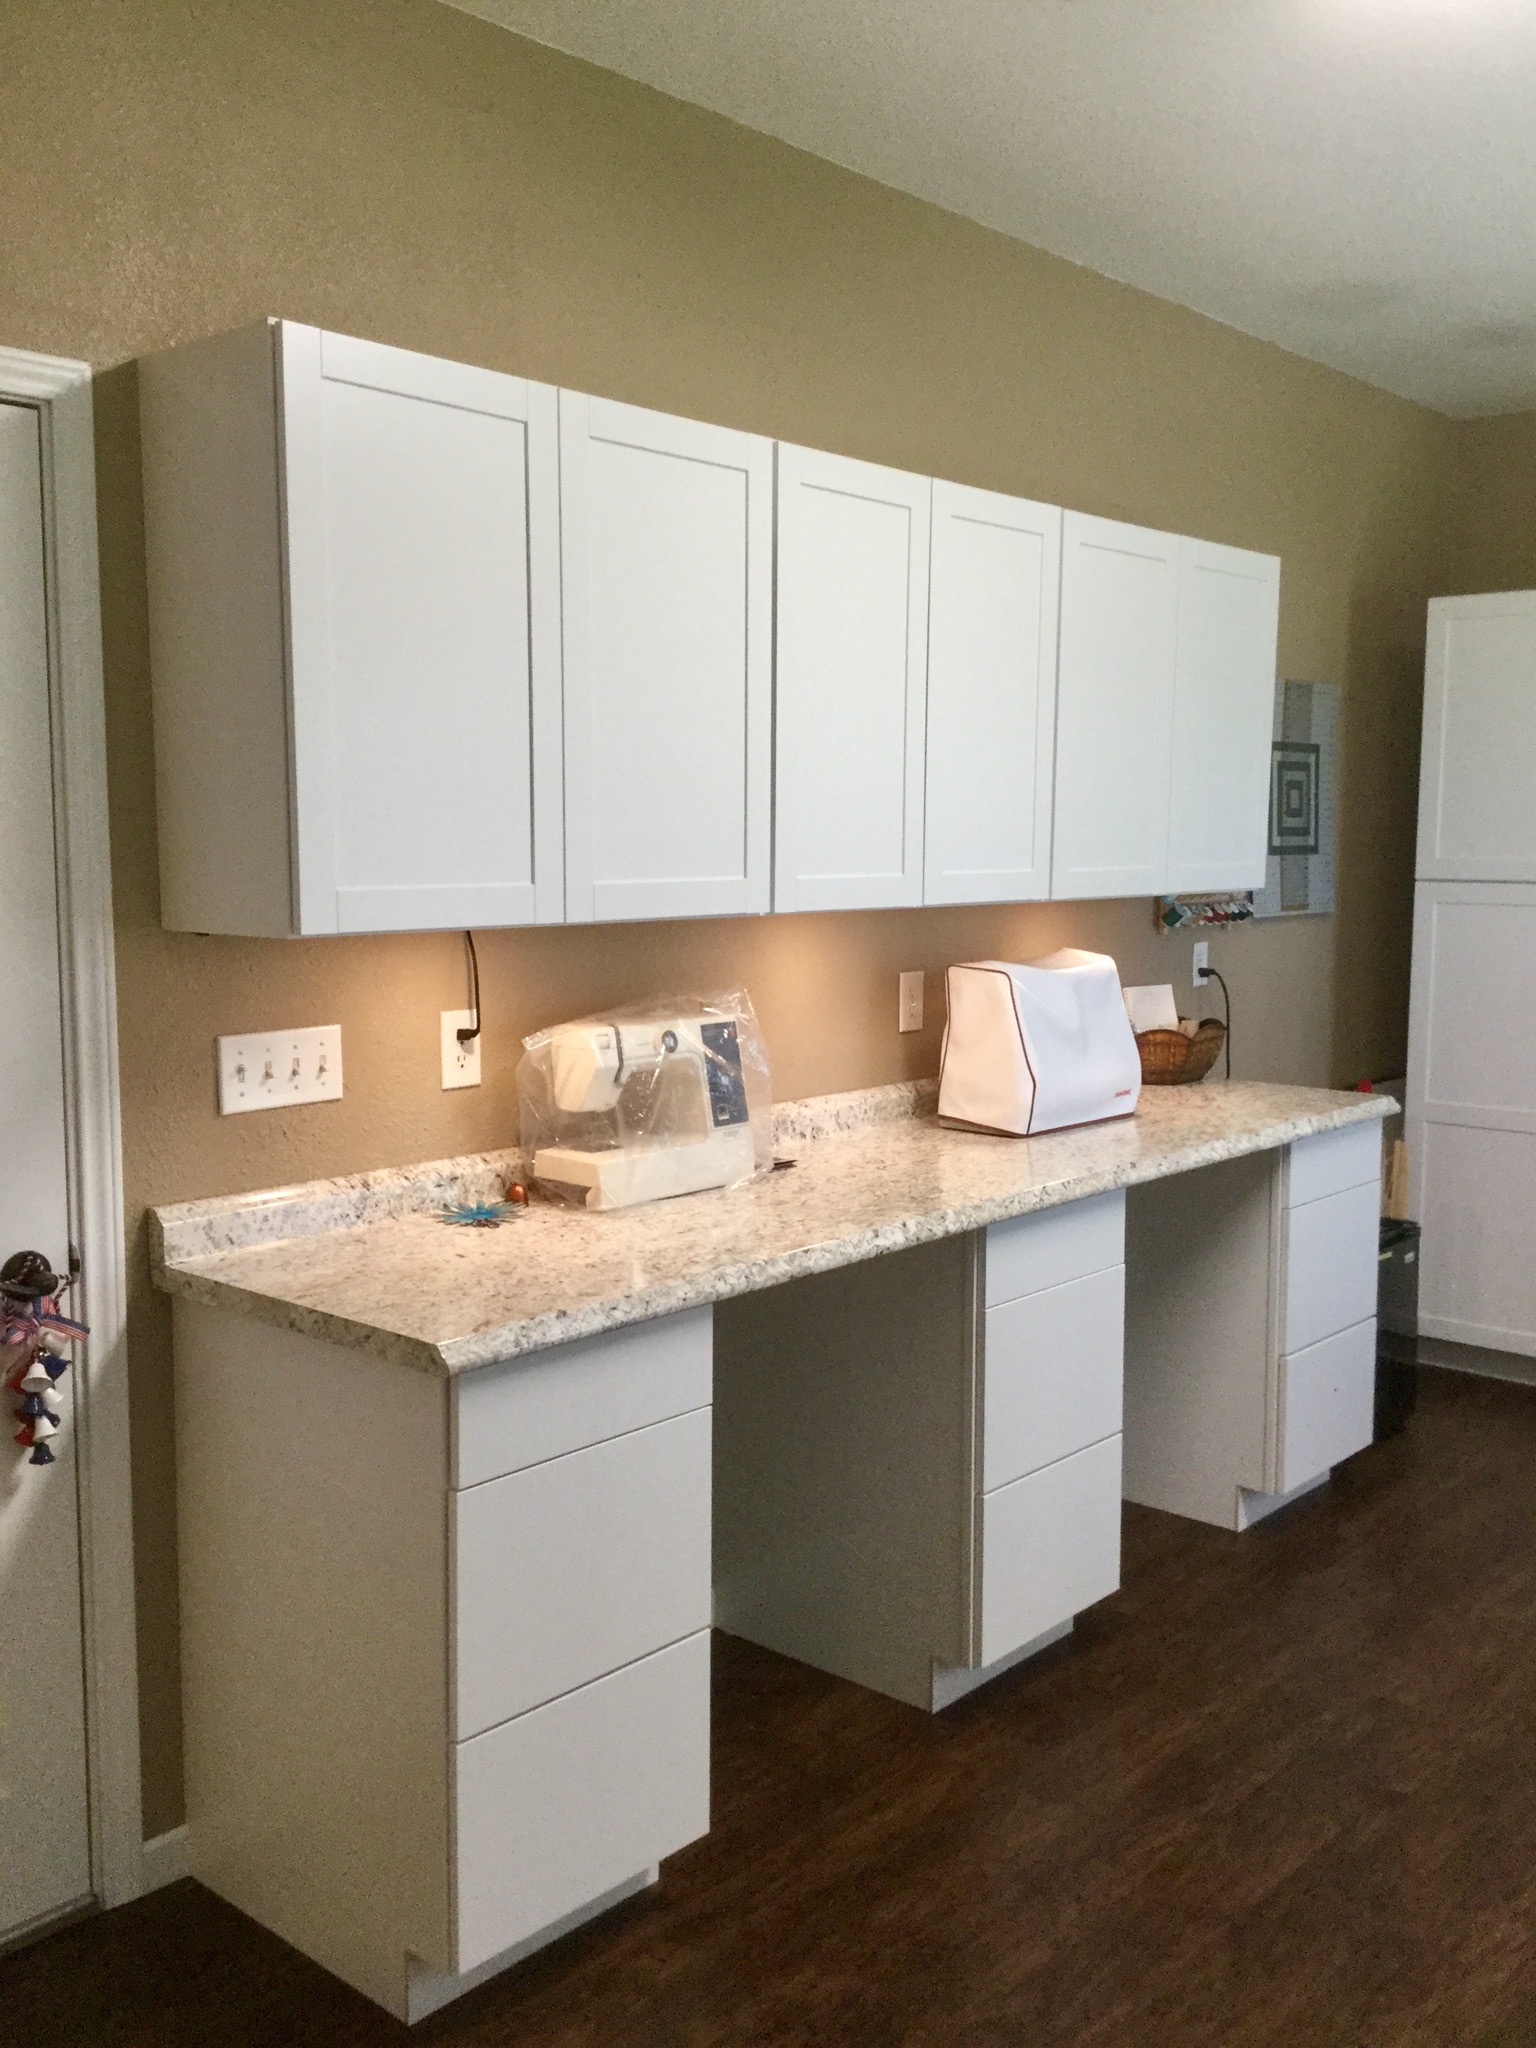 This little dresser was found on the street…literally. My neighbor had put it out at the end of her driveway with a big FREE sign on it. I called her to make sure it was ok for the taking and when she said ‘yes’, I grabbed it, not having any idea what I was going to do with it.
It sat in my shop for several months, empty, until I decided to use it to store fabric and sewing items. It was in perfect condition and I haven’t done anything to It, other than clean it up a little.
The other cabinet held mainly, paint and various other crafting items.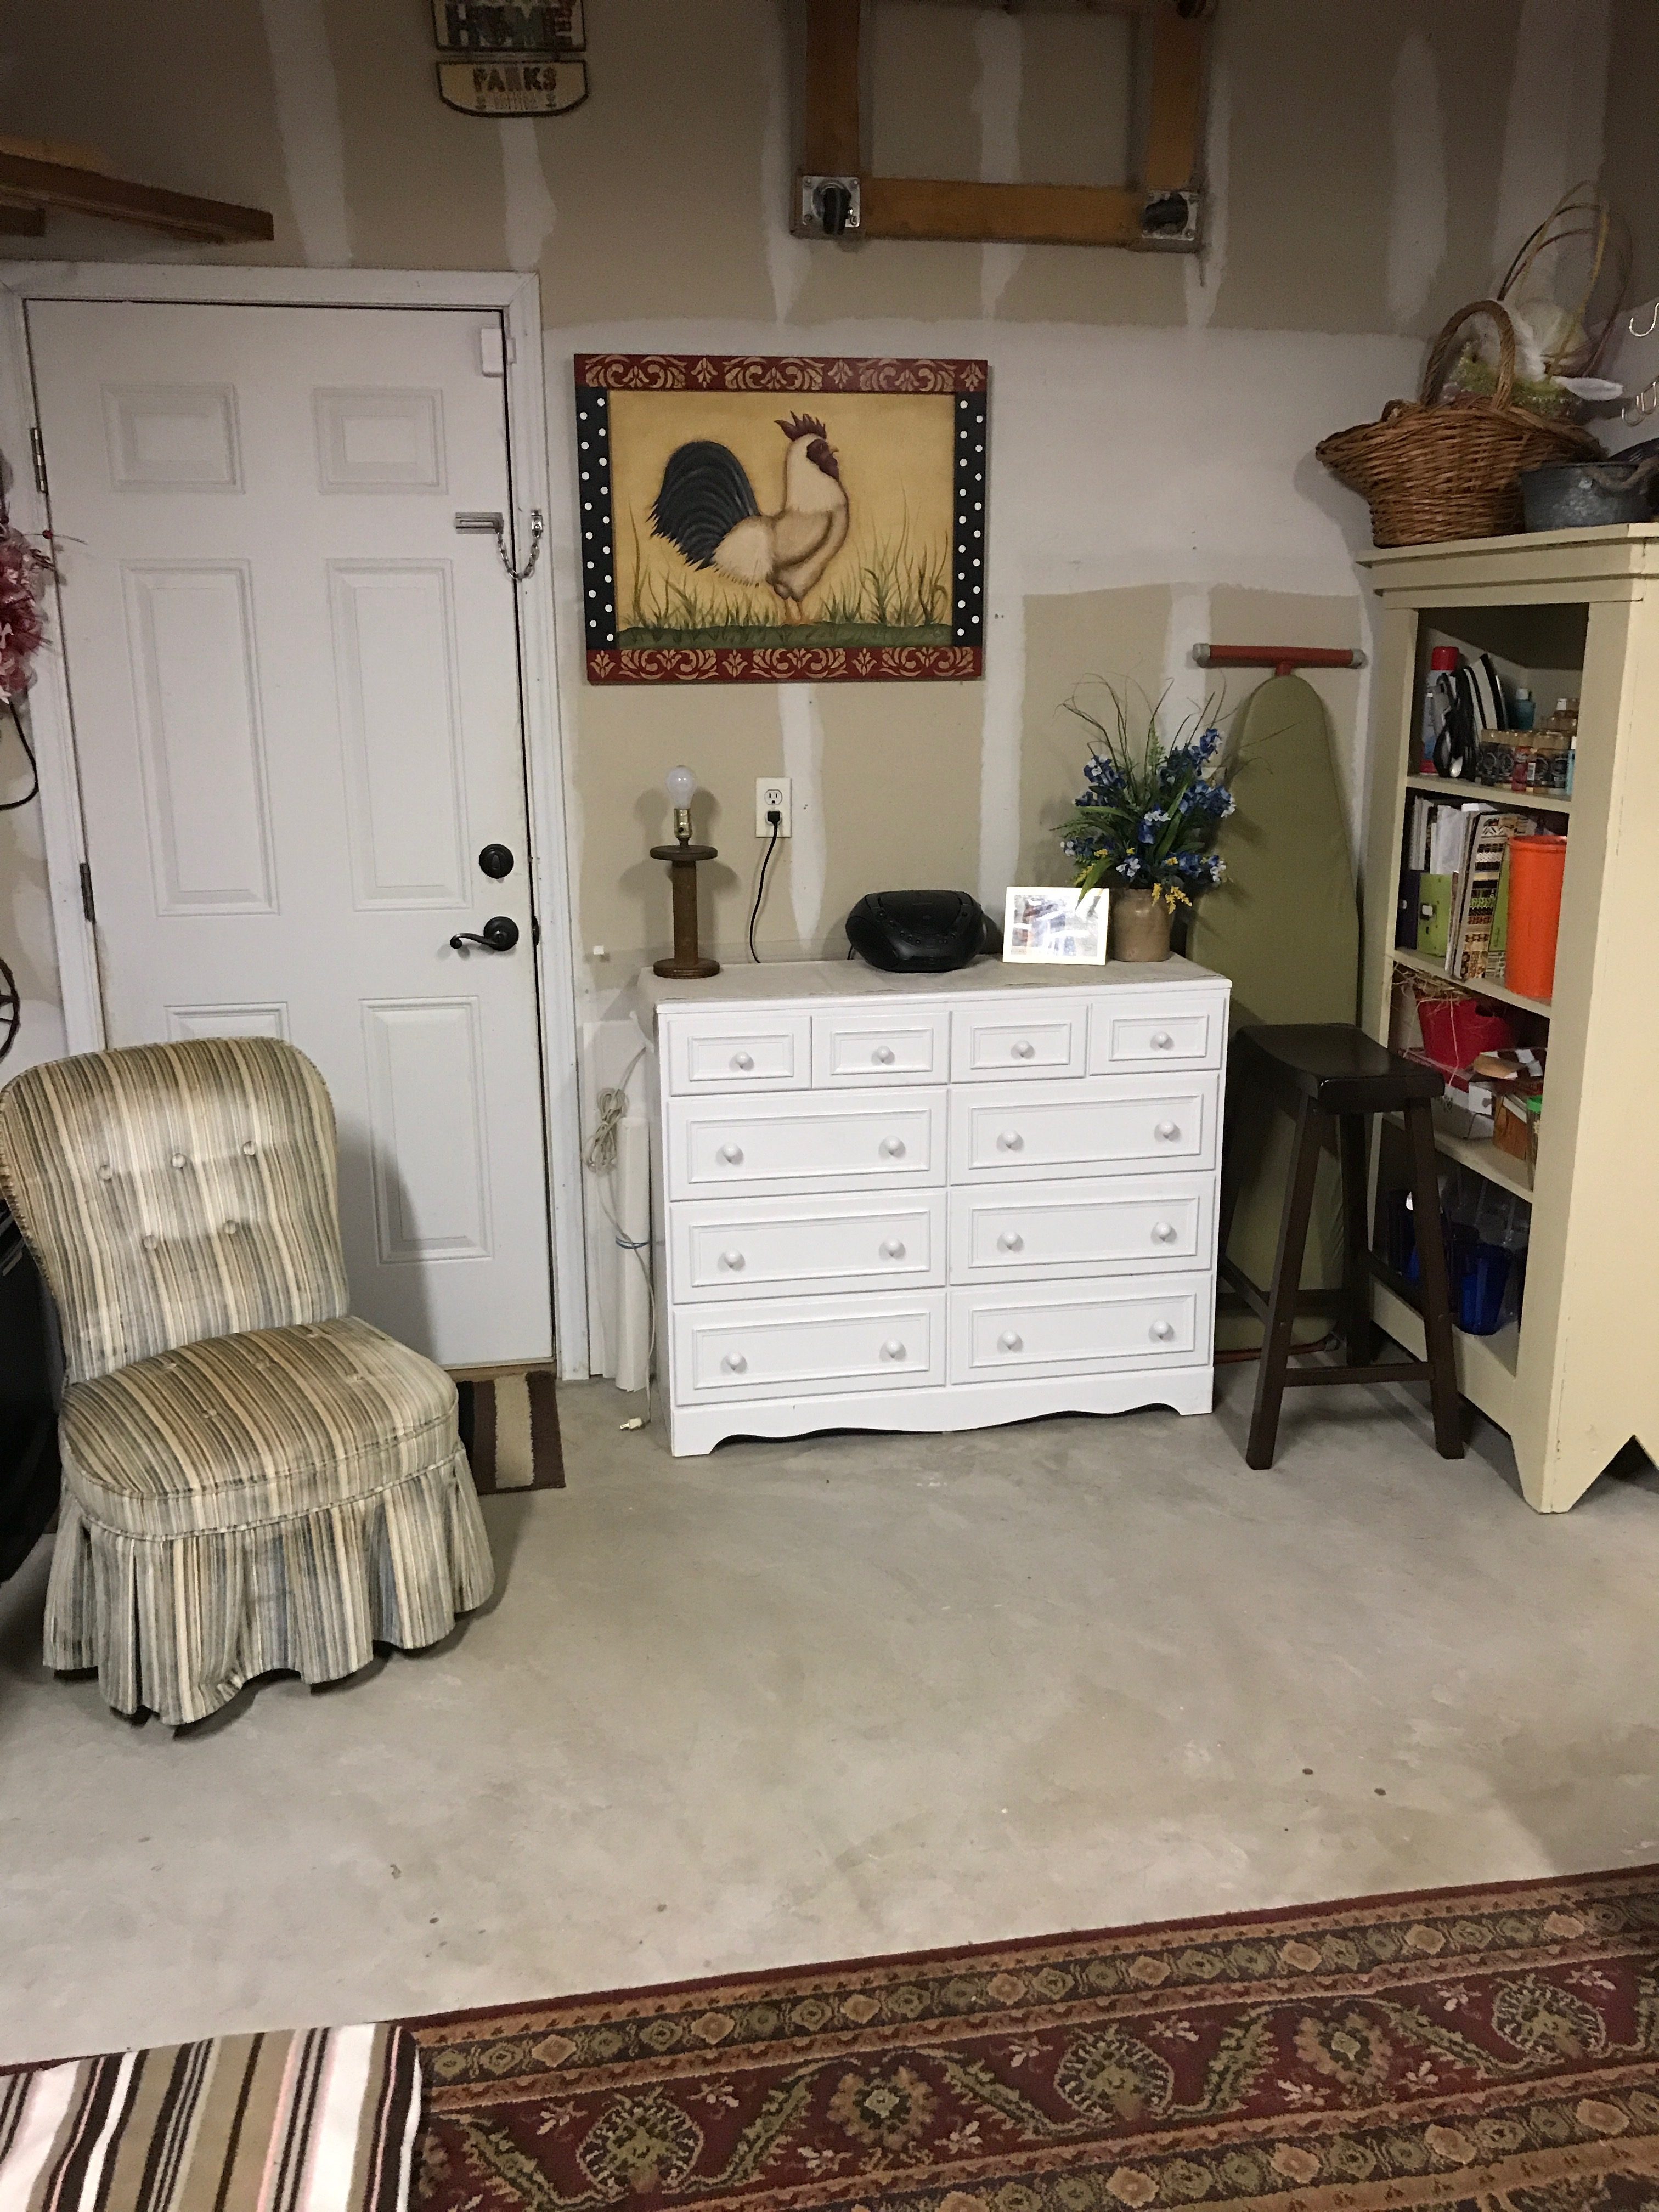 Now this area is my writing/blogging station.
Have I told you how much I LOVE it?! There’s so much storage above and below. I may never fill them up. (yeah…right!)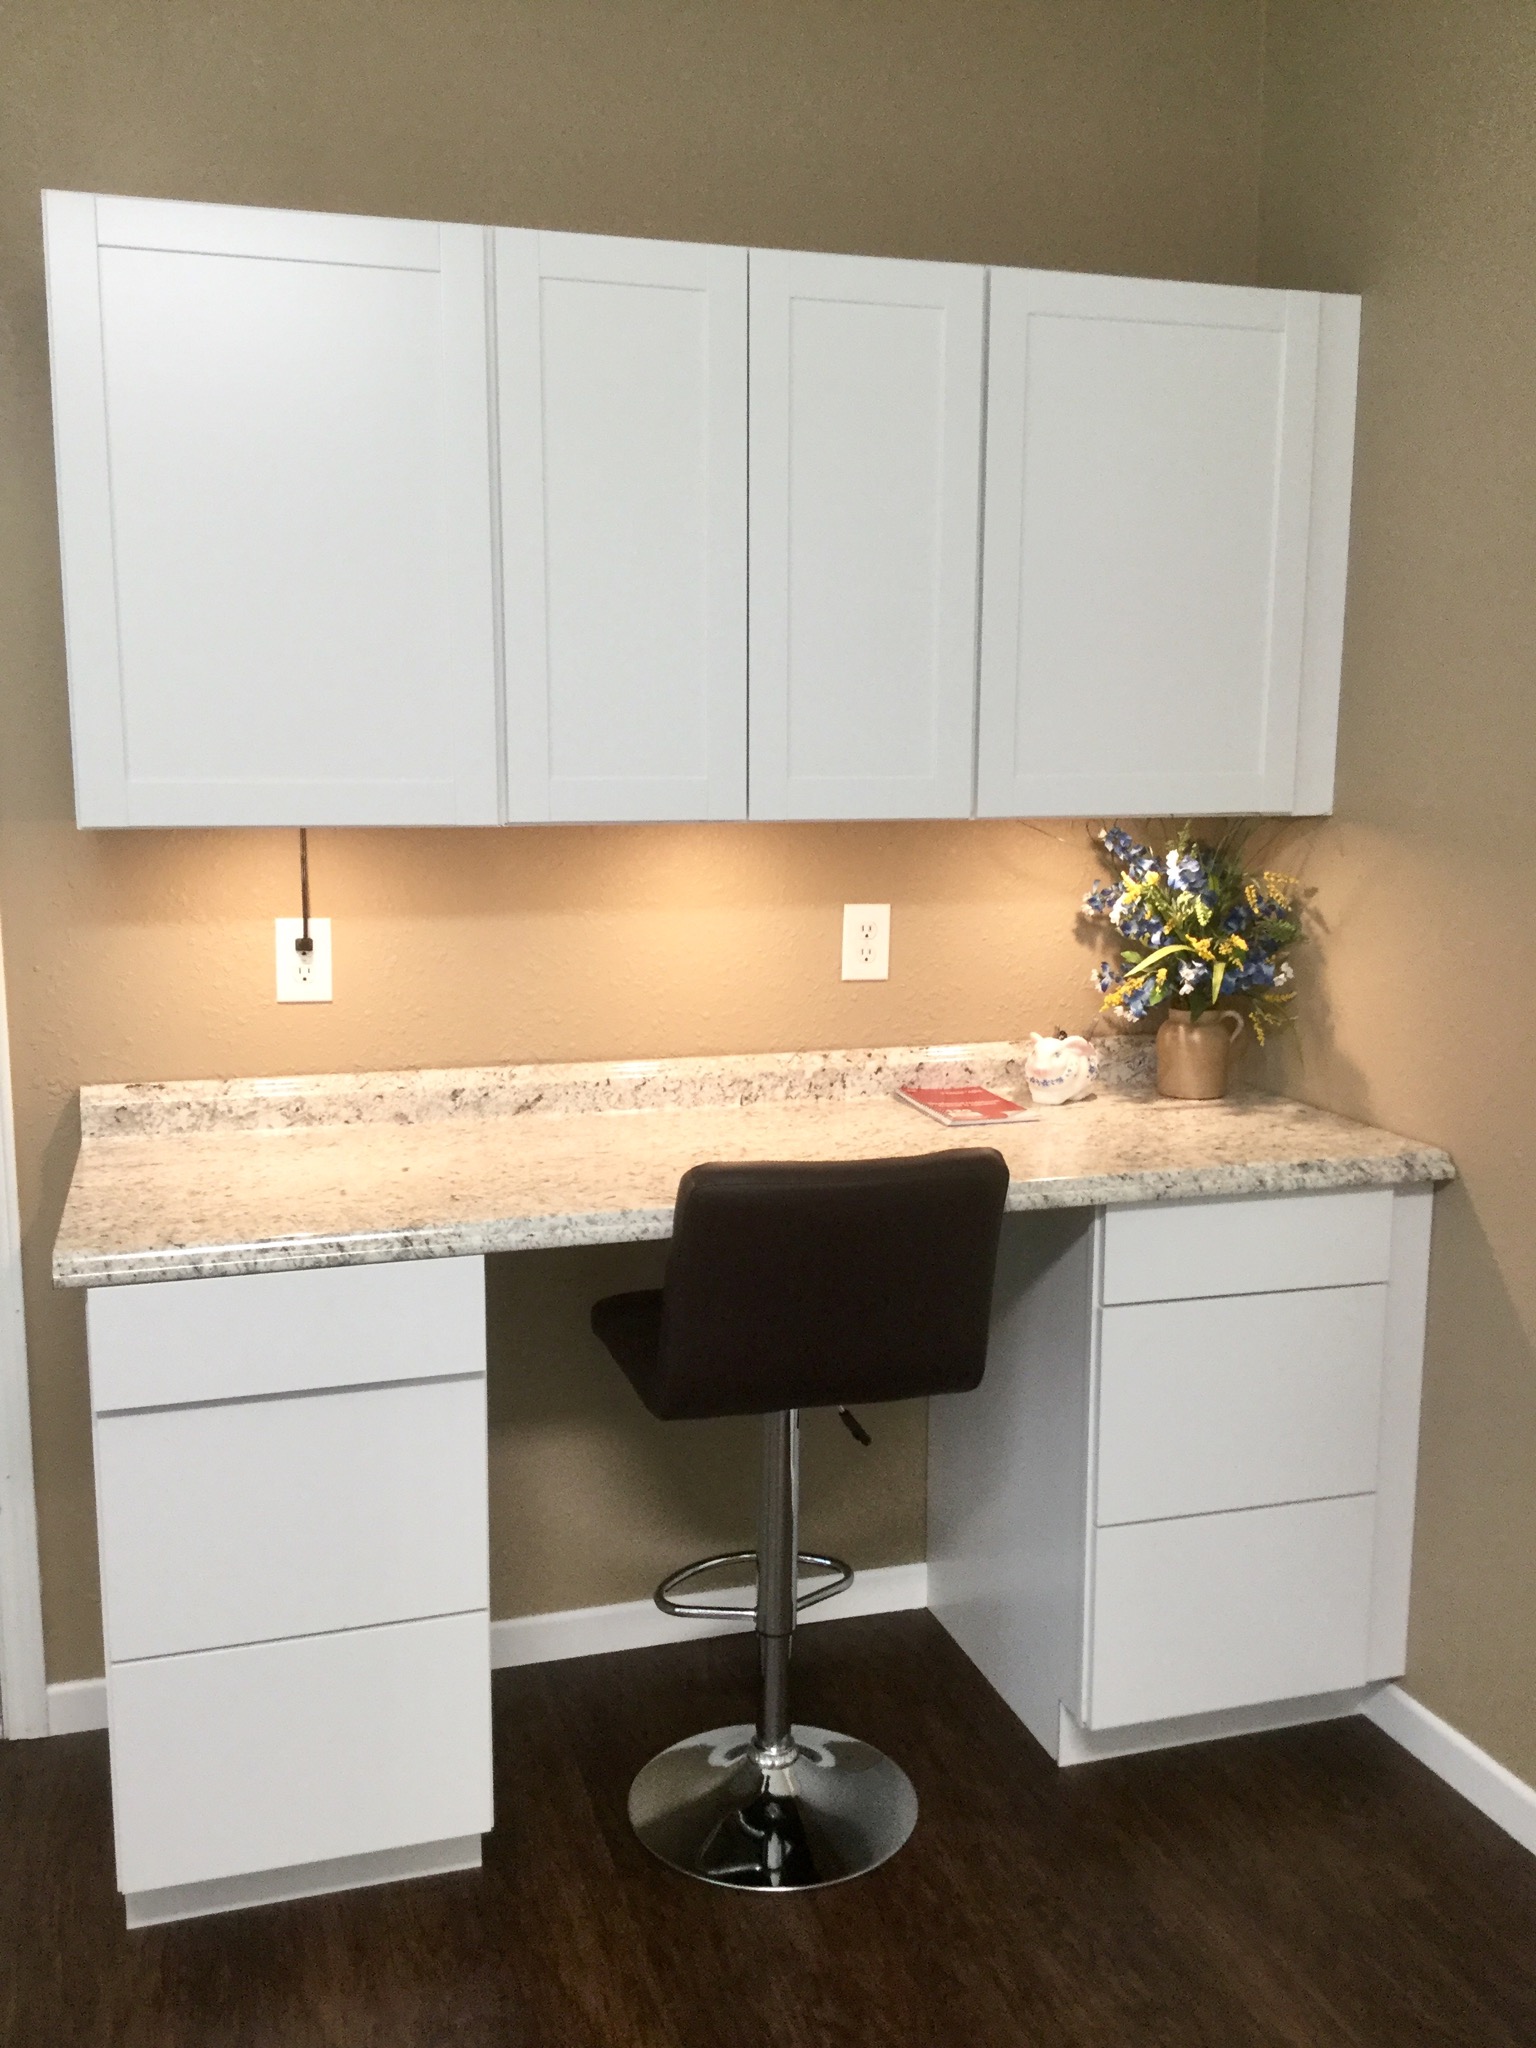 I put these four pics together so you can see the progress of the transformation.
Pic #1 was right after we cleaned it out. Hubby is removing the garage door tracks.
In pic #2, he’s building the frame around the garage door so the cabinets can be attached.
Pic #3 was after the room had been painted, AC was installed and the floors had been put down. You can see the “new” wall that will be behind the cabinets. You’ll also notice in this pic that he trimmed both of the windows out. What a difference it made!
Pic #4 is the finished product.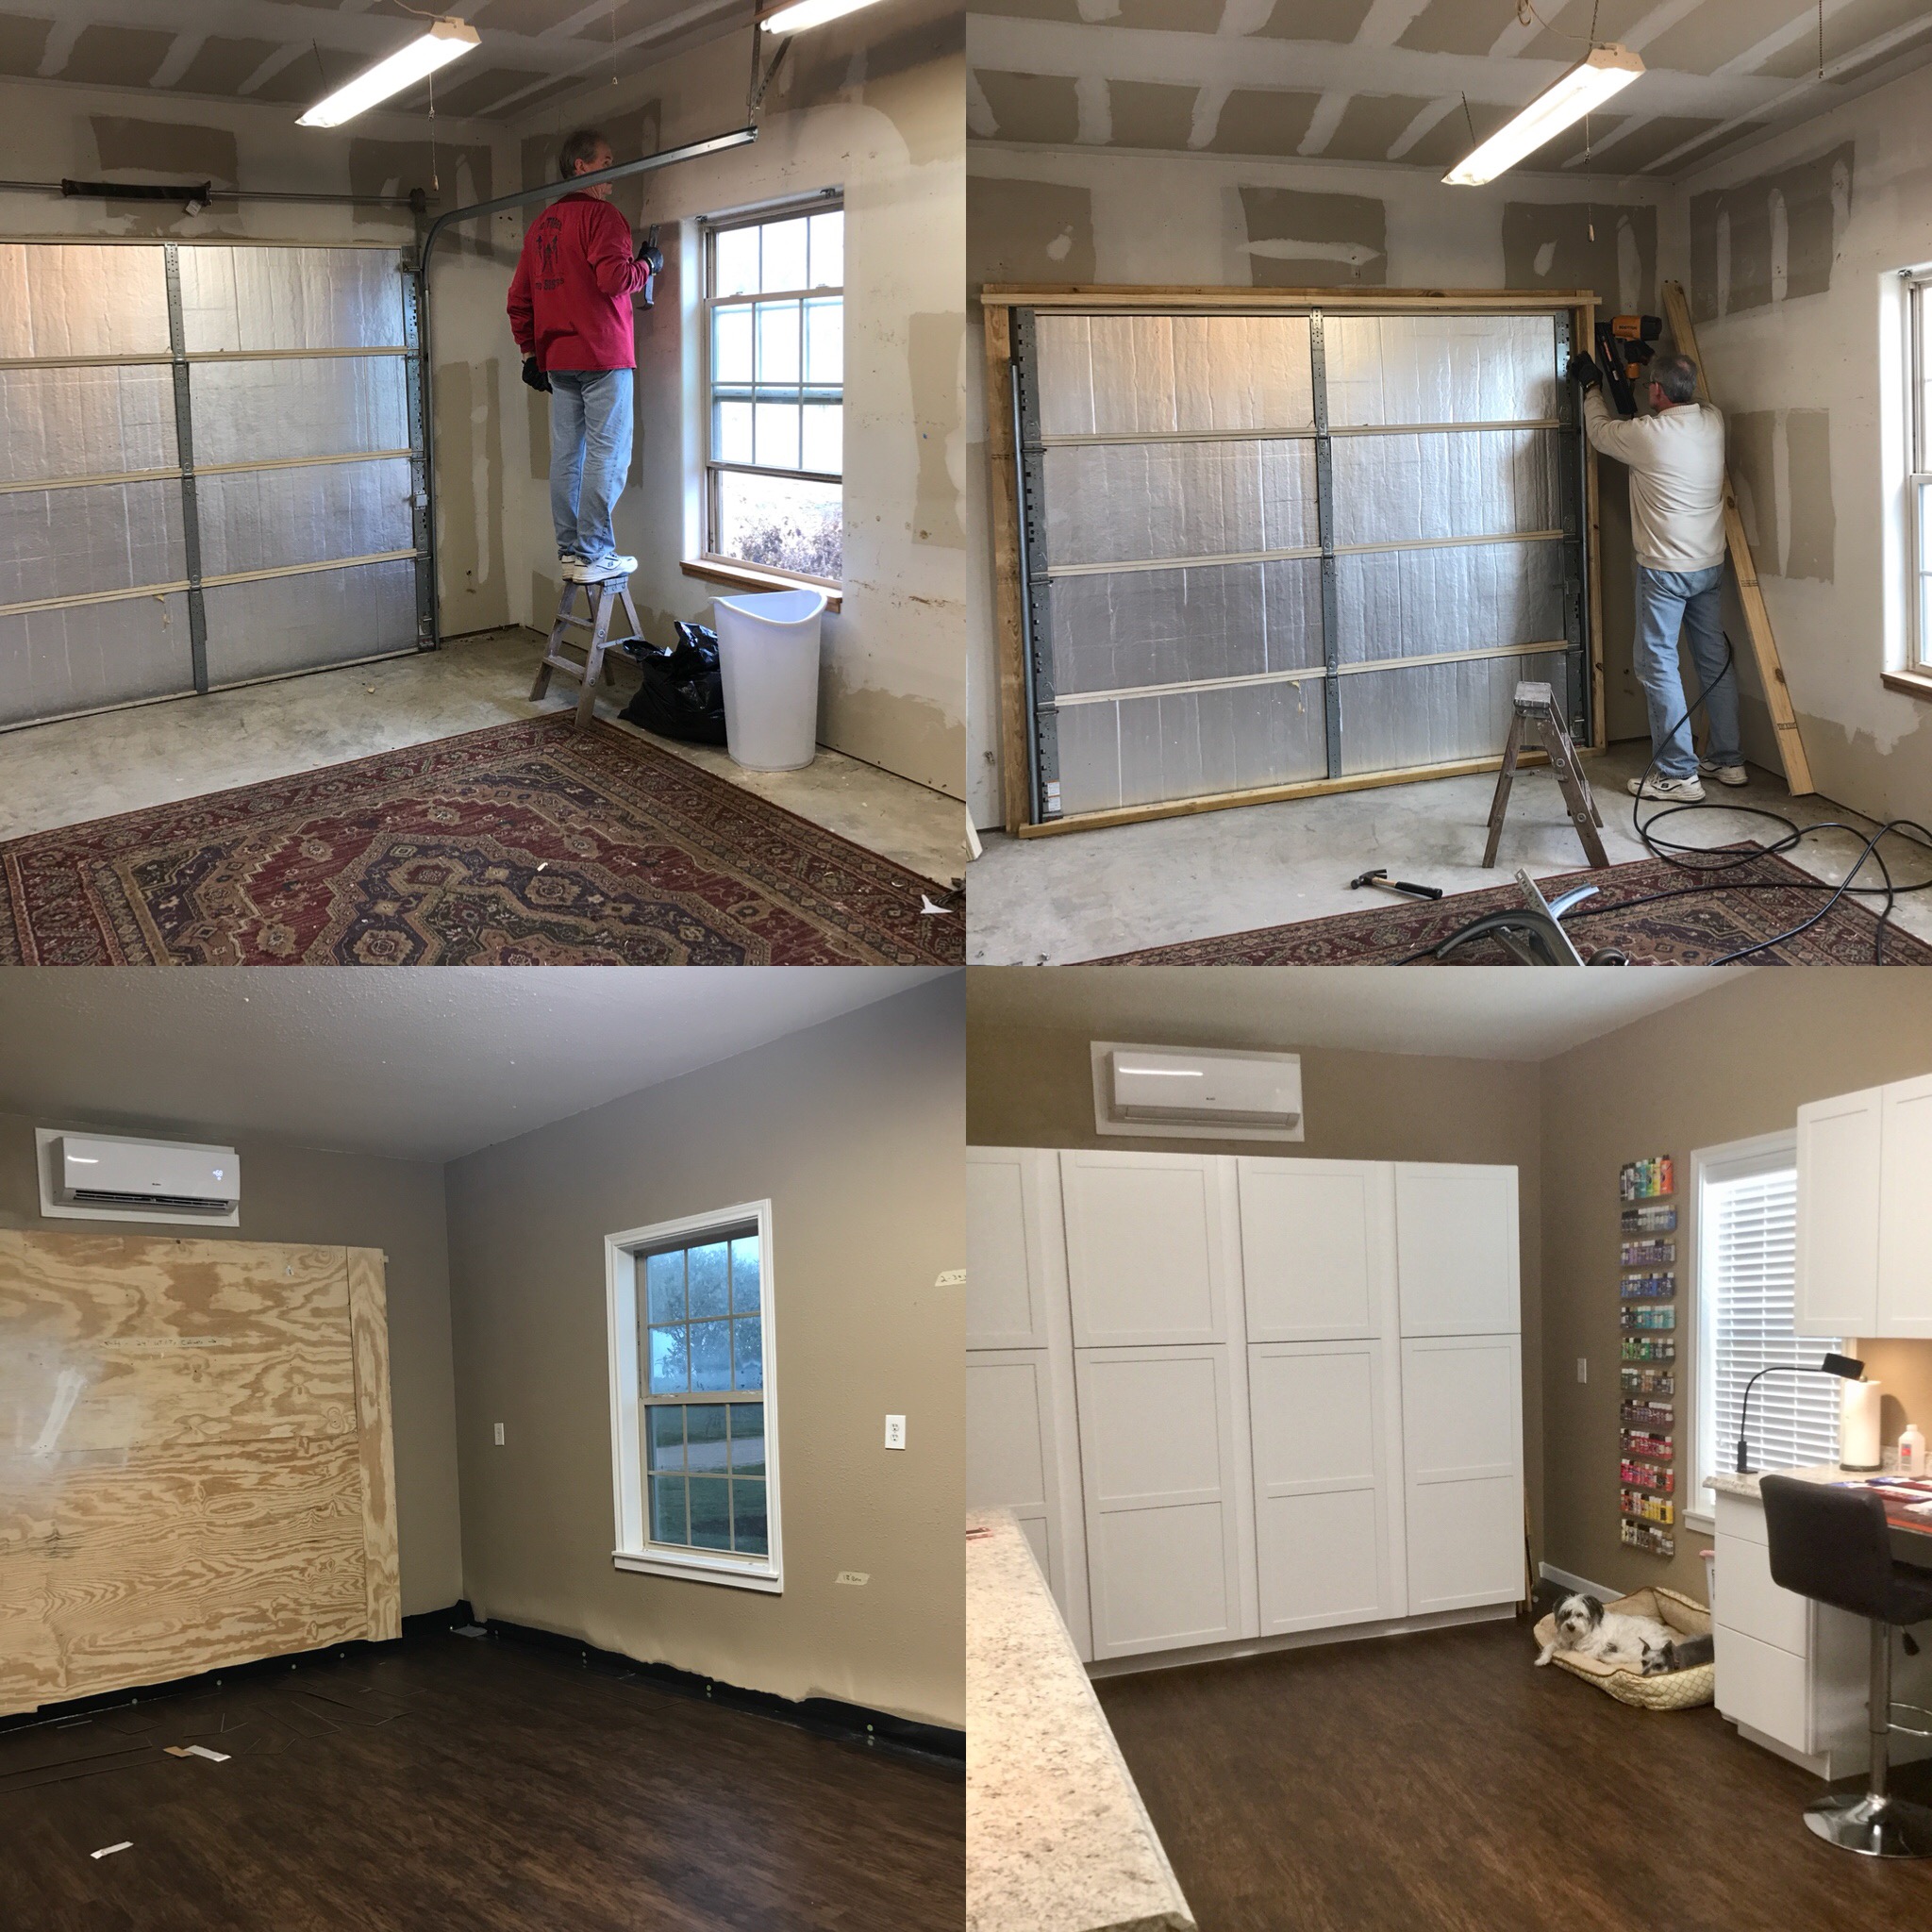 This is a better shot of the painting station. The work space is the almost same size as the old work bench, but OH THE STORAGE above and below!
The countertops are deeper and much more aesthetically pleasing.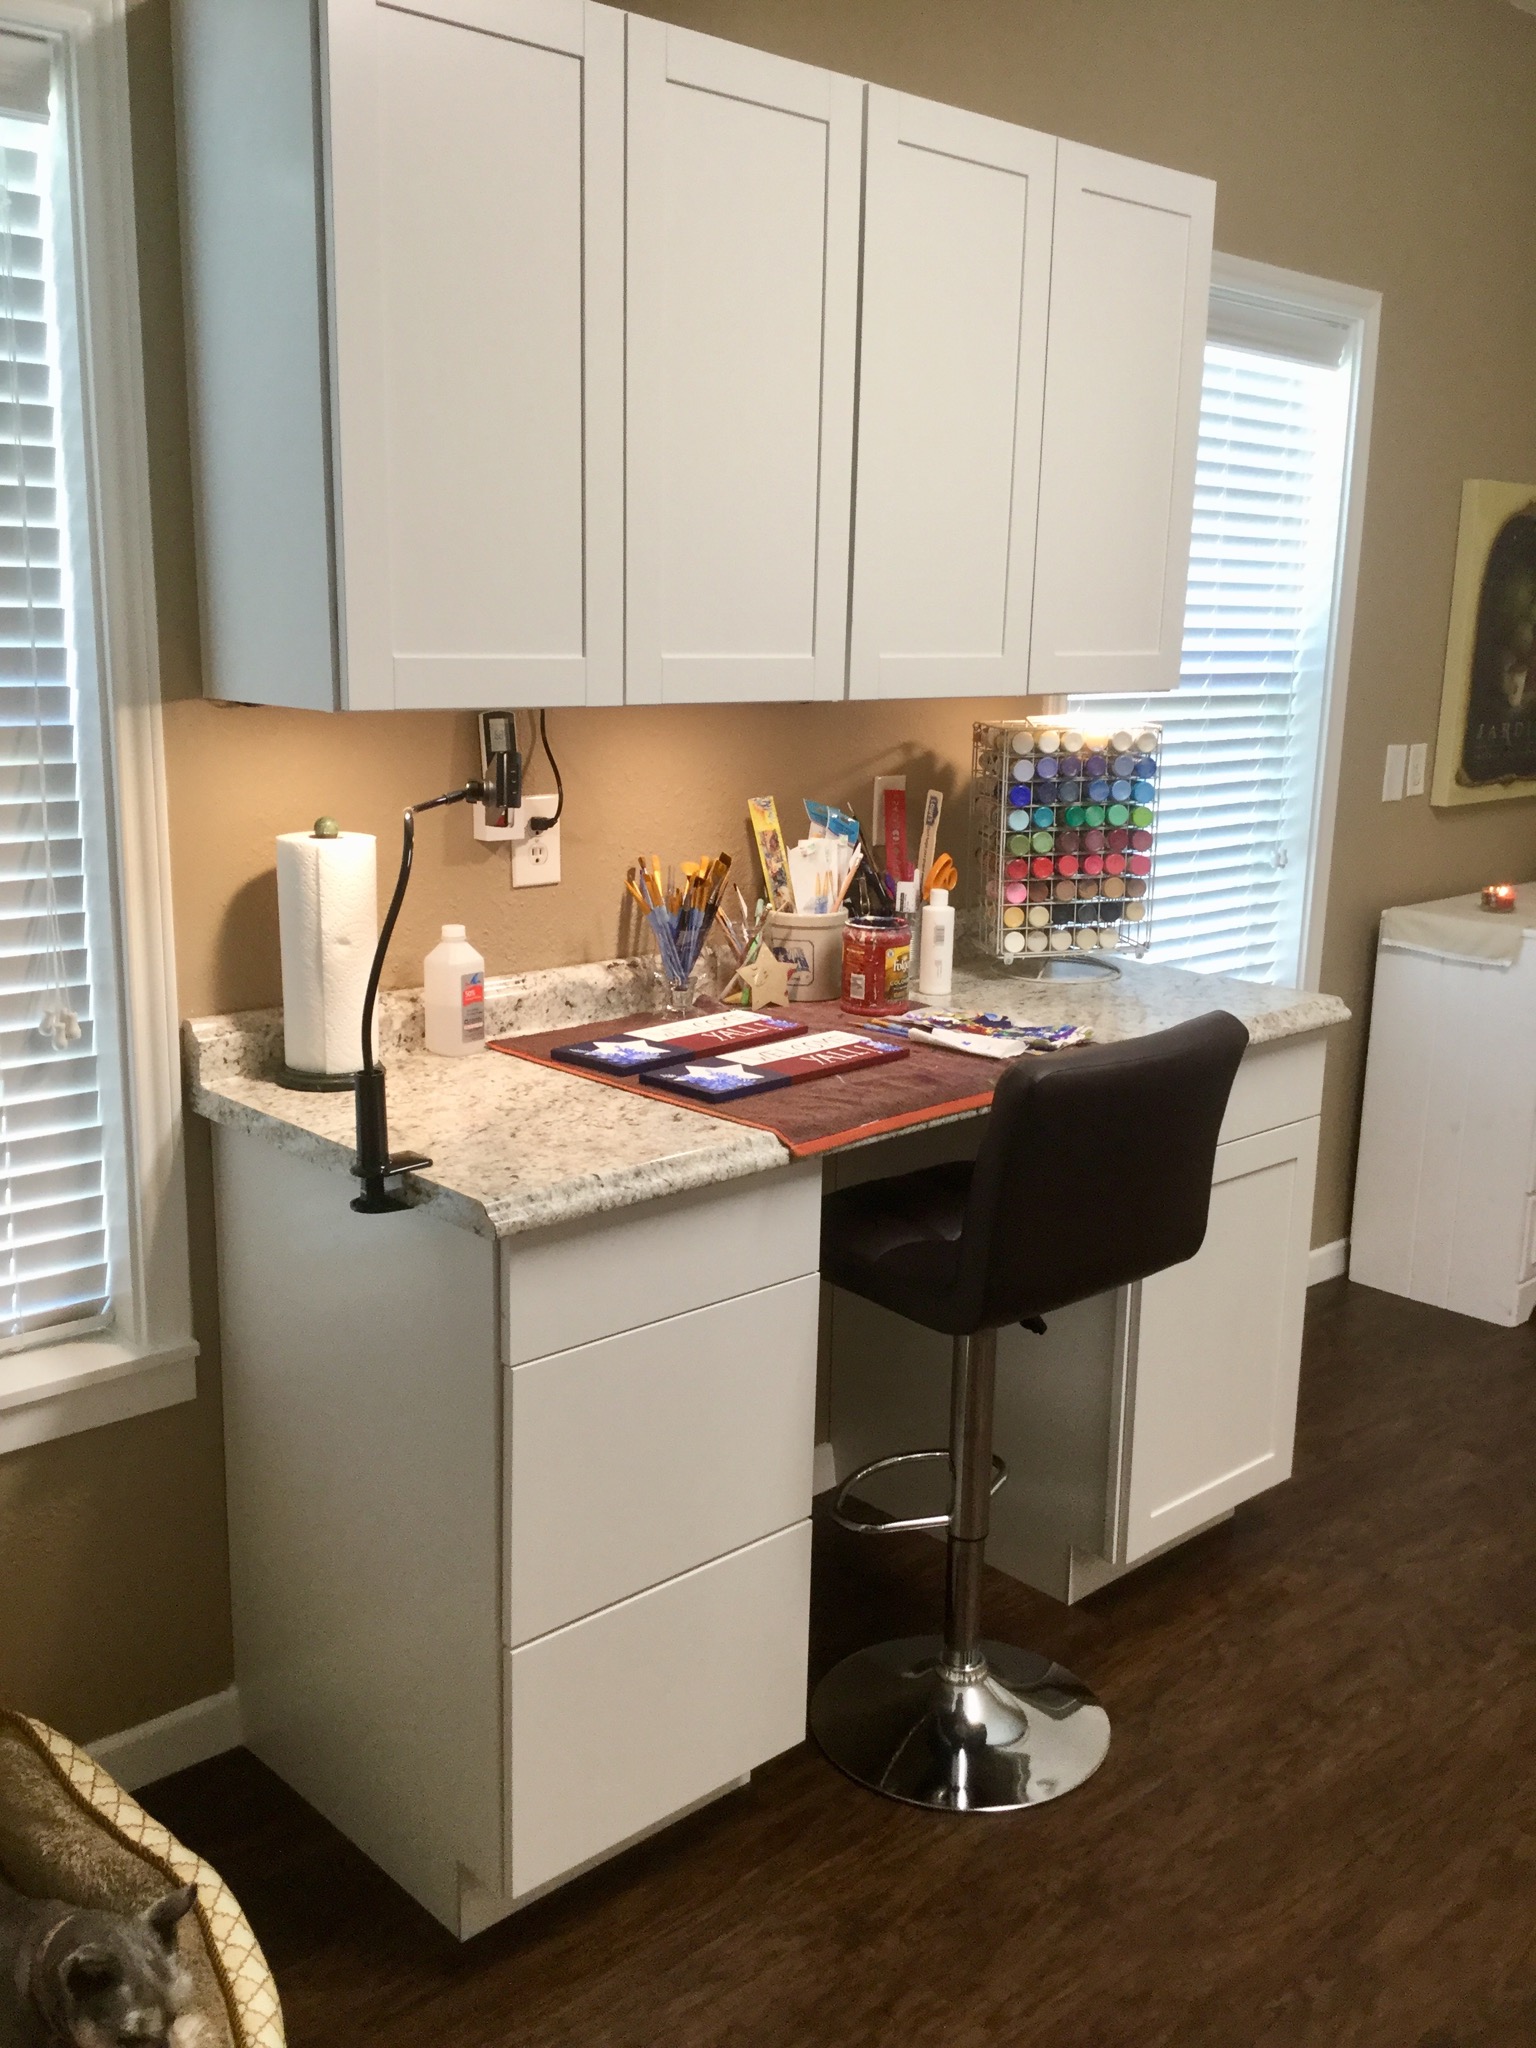 My little curbside find has the perfect spot all to itself. It was as if it was made specifically for this space.
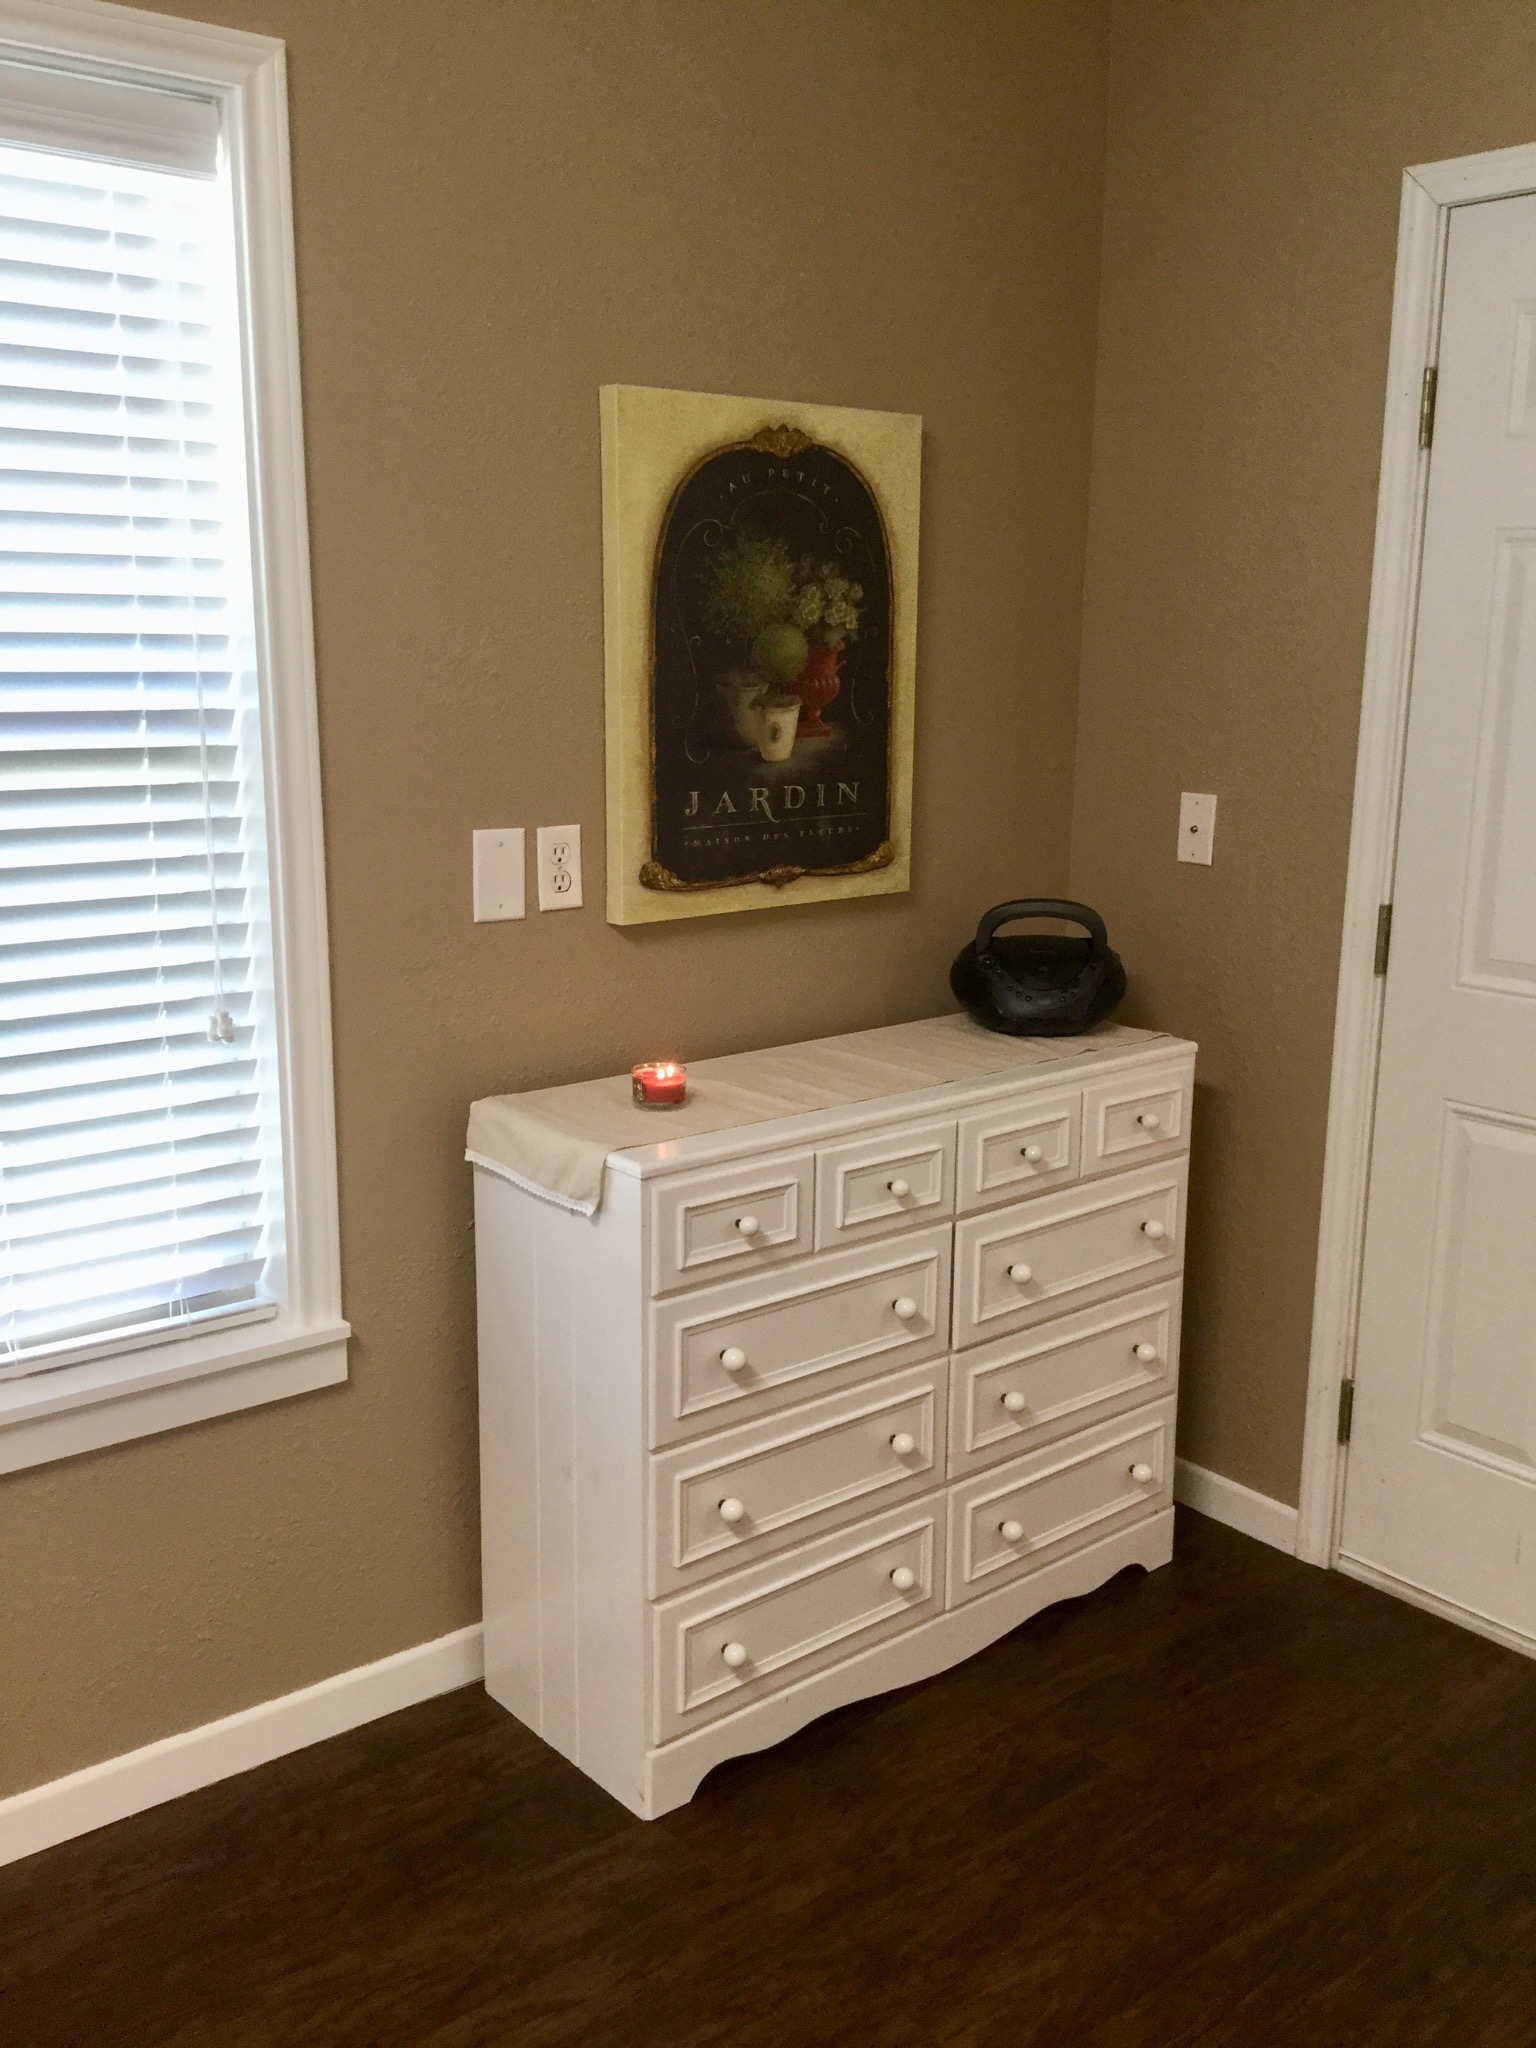 I won’t show every drawer, but it’s wonderful having a place for my fabric. I organized it by using foam board from the Dollar Tree and cutting 4×6 squares, folding & wrapping the fabric around it and pinning it to hold it secure. Super simple!
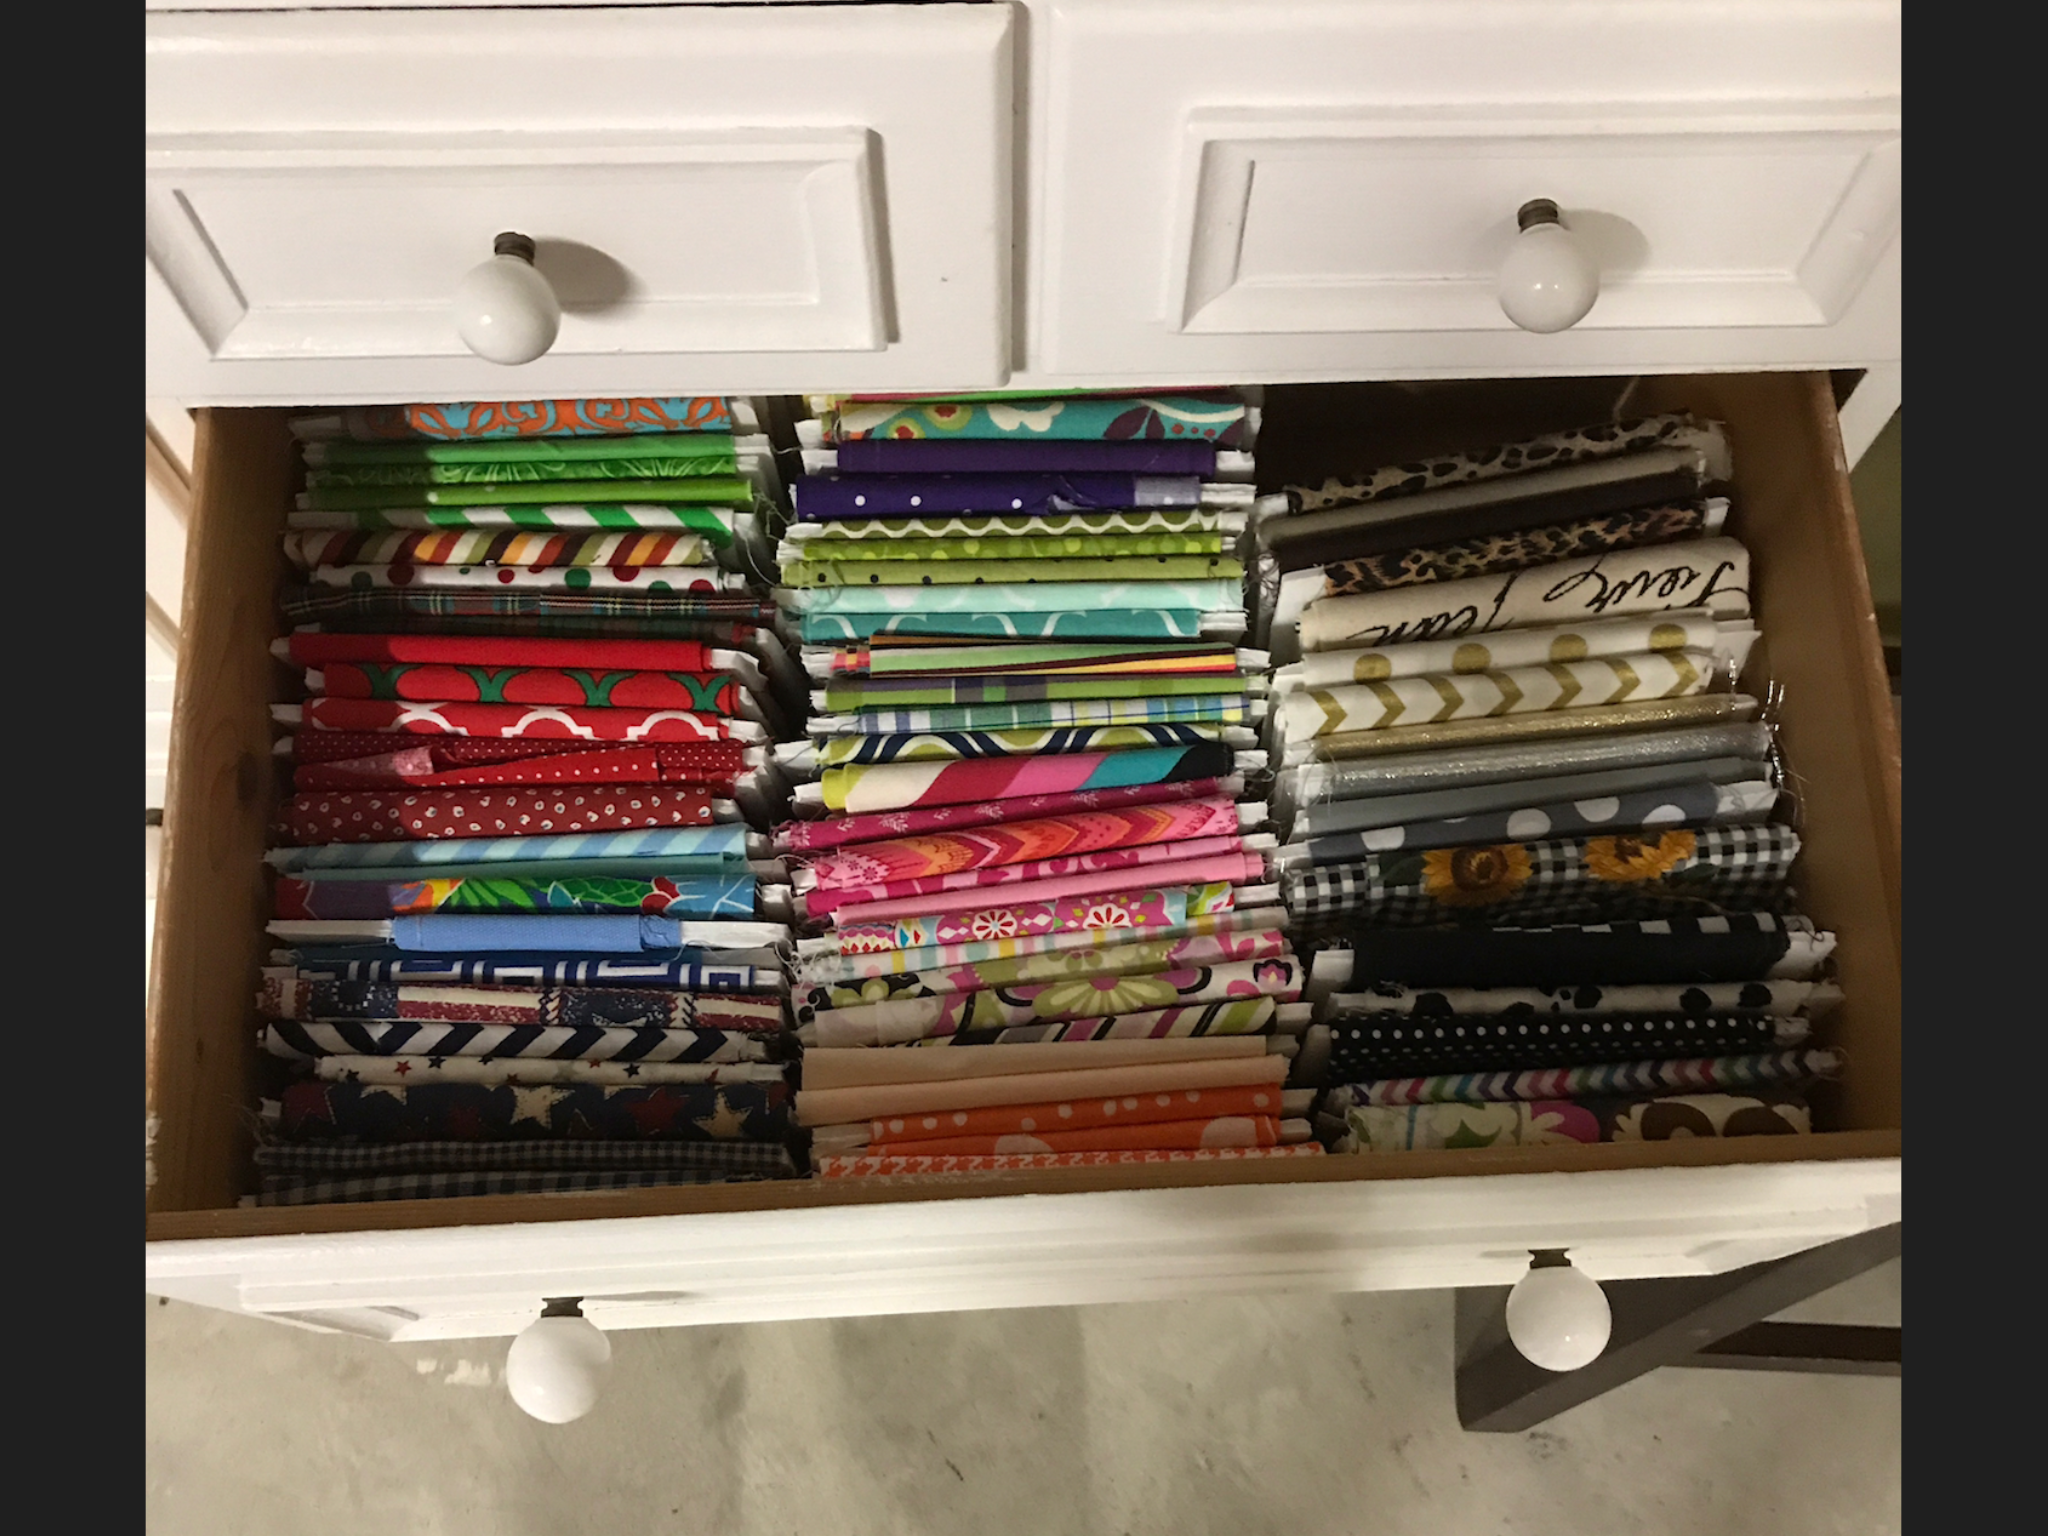 This is one of my favorite areas.
When my paints were stored in a cabinet, it was hard to know what I had. I had to throw tons of paint away, because it had gotten too thick or had completely dried up. But now, I don’t have to guess. I can see exactly what I have.
These little shelves are made to hold nail polishes, but they work great for paint bottles. I even organized by color, which make it so much easier to find.
(A list of resources is down below.)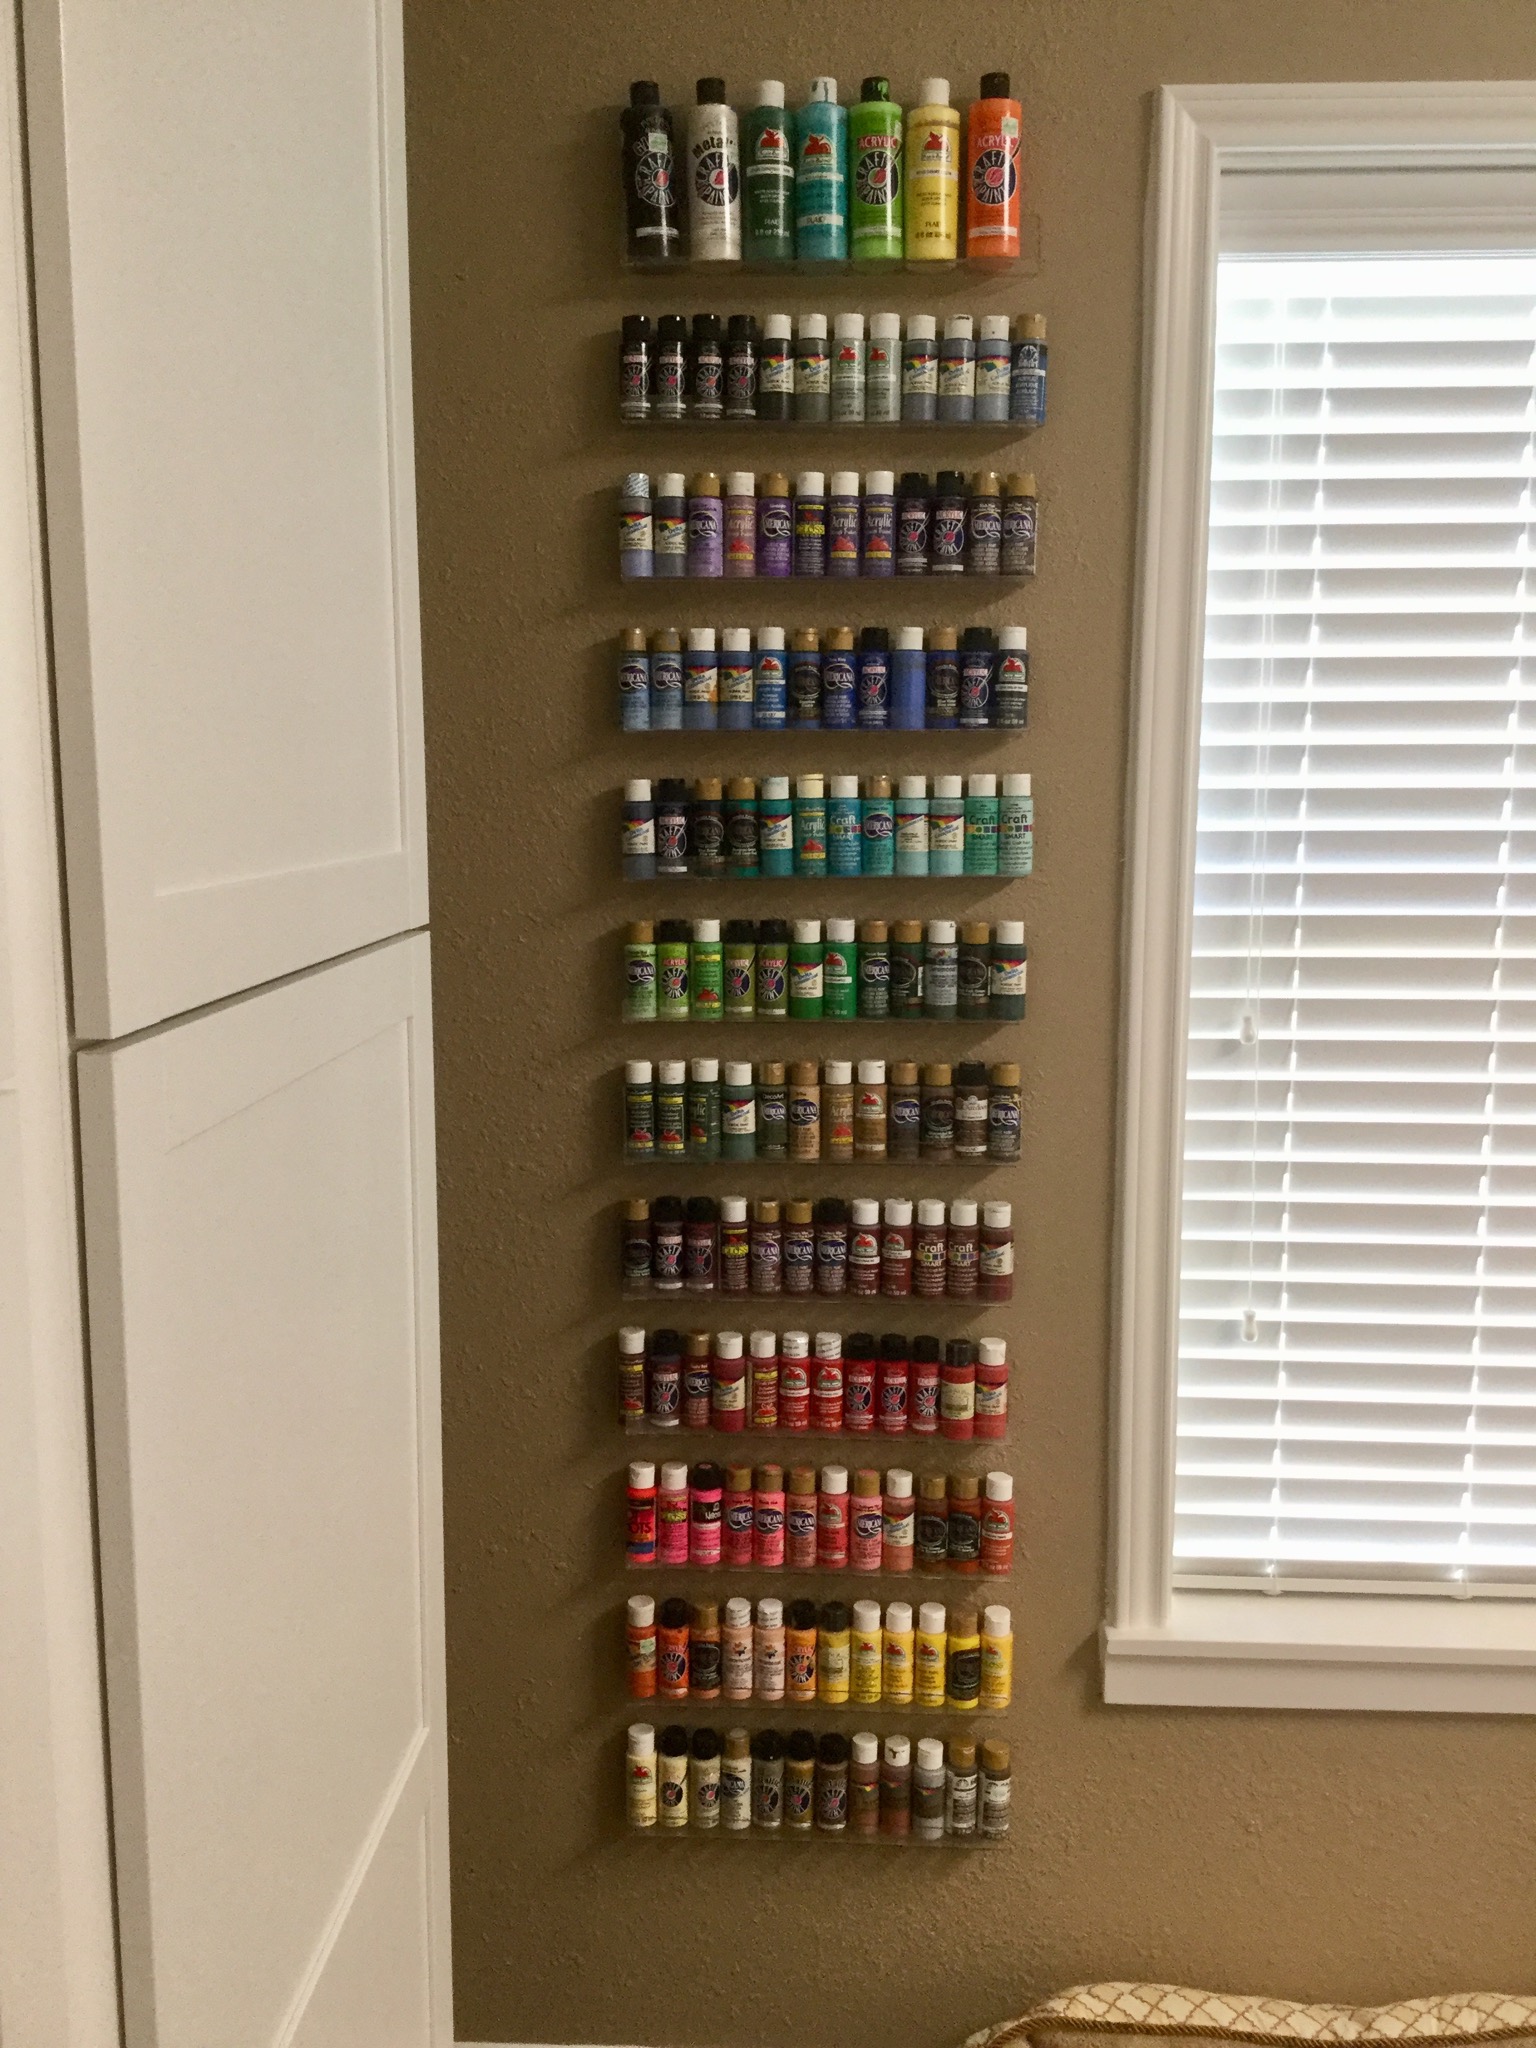
This craft room makeover took about two months to complete and even though the cabinets were “stock”, some still had to be ordered. Hubby did as much as he could, prior to the cabinets arrival, so when they finally arrived, it went pretty fast.
Hanging them was a task that he didn’t want to take on, so we had a friend, who happened to work in the cabinet industry, hang them. What he did in a day and a half would have taken my sweet hubby much longer. We did pay him, but that was one of the expenses that was well worth it.
Project Complete!
I’m so happy to have this craft room makeover project done! I never dreamed I would have a space like this. And to think!…I just wanted it painted! Yes, we spent a little more (er…a lot…), but in the long run, the extra expense will be well worth it.
We cashed flowed the whole project, so it’s mine, 100%! We’ve not only created a beautiful space for me to be able to work in, we’ve added value to our home. It’s a win-win situation and now I can say, “Bring on the projects!” WooHoo!!
If you have questions about anything, please let me know in the comments and if you enjoy the Love to Frugal blog, be sure to subscribe so you never miss a post!
Craft Room Source List
- Cabinets – These were stock cabinets from Lowes. Like I said, Lowes had many of the cabinets in stock, but there were some, like the 4 pantry cabinets, that had to be ordered. ARCADIA is the name of this particular cabinet. (Note: Lowes was great. We took our measurements in and they have a computer program that will give you a visual of what your room will look like, after they plug in the measurements.)
- Paint – Sherwin Williams Latte.
- AC/Heater – Gree mini split AC/Heat pump
- Countertops – VT Dimensions Formica – Ouro Romano purchased at Lowes.
- Flooring – Shaw Matrix Vinyl Flooring in Franklin Hickory. This is a “floating” vinyl floor. There is no glue or adhesive. It locks together and was rather easy to install. It’s supposed to be waterproof, but since it was installed on a garage floor, he put down a vapor barrier for laminate floors. So far, I love it!
- Lighting – Good Earth 48″ Carlyle light purchased at Lowes. This is an LED and is extremely bright. Originally, we bought two, but ended up taking one back. One is definitely sufficient in this space. The task lights under the counters are also LED and are “lighting pucks”.
- Bar Stools – Amazon (See link below) Love these! They come as a pair and are extremely comfortable and super easy to put together.
- Paint Shelves – Amazon (See link below)
- Blinds – These blinds are from Blindster.com

Your new craft / painting / sewing / blogging workshop is fabulous! I can see why you are so excited. What a marvelous place to work! You and Mike put a lot of effort into the planning and labor to make every detail just right! I don’t expect to ever have a workspace like that, but I do not produce anything that brings in any income, so it’s ok. Actually, I would be extremely happy to have a workspace even like your ‘Before’ picture! However, I don’t think I would want to put my sewing things out there with all the gardening, beekeeping and other stuff we have in our garage. I know you do gardening too. You must have a really large garage or keep your gardening things in a separate shed.
Thank you, Deb! I’m thrilled with how it turned out! I’ve been dreaming of this for years! This room is the third bay to the garage, but we have a shed in the back that houses the mower and most of his lawn stuff.
This space has been my “shop” ever since we moved here, seven years ago and I loved working out there. I didn’t realize how “sad” it looked till I saw the side by side before and after pics. Wow! Such a contrast!